Embroidering Magic: A Step-by-Step Guide to Yoda Embroidery Design
Intro
In the event that you’re a Star Wars fan and adore the art of embroidery, at that point, you’re in for a treat with this step-by-step direct on making you exceptionally possess Yoda embroidery design. From choosing the ideal design to mastering the embroidery methods, this guide will take you through the method of making a mysterious Yoda masterpiece that will impress all your companions and individual Star Wars enthusiasts.
Preparing Your Materials
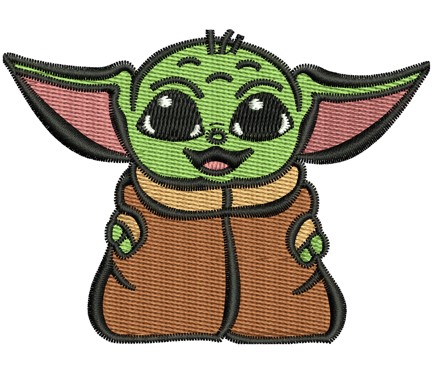
To kickstart your journey into the charming world of Yoda embroidery, assembling your toolkit is the primary step. You’ll require an assortment of embroidery floss shades, particularly in greens and browns, to precisely capture Yoda’s notorious appearance. An embroidery band is basic for keeping your fabric tight and reasonable as you work. Select embroidery needles that are appropriate for the fabric and floss you’re utilizing; these apparatuses will be significant for exact stitching.
The choice of fabric can enormously impact the ultimate result. Choose a fabric that’s tough however simple to stitch through, such as cotton or material. This will serve as the canvas for your Yoda masterpiece. Guarantee you have got a combination of sharp scissors on hand for clipping threads and trimming fabric edges.
Finally, secure a Yoda embroidery design format. This could be found online or made in case you feel courageous. The format will direct your stitching, making a difference to transform a piece of fabric into a tribute to the shrewd Jedi Ace. With these materials prepared, you’re set to set out on your Yoda embroidery project, embroidery together with expertise and imagination to bring the adored character to life through your artwork.
Choosing Your Yoda Design
Deciding on the perfect Yoda embroidery design is a pivotal moment in your embroidery project. This choice will dictate not only the complexity of your task but also the emotional resonance of your finished piece. While some may lean towards minimalist representations, capturing Yoda’s silhouette in a few, elegant stitches, others might be drawn to designs that detail every wrinkle and wise gaze, embodying the depth of the character’s wisdom and strength.
Begin by browsing various designs—either online through dedicated fan sites and embroidery forums or in pattern books specifically geared towards Star Wars themes. Consider how each design might translate to embroidery:
less difficult designs may well be quicker to total but might need a few character subtleties, though more point-by-point designs will require time and tolerance but eventually yield a more expressive and complicated depiction.
Reflect on your expertise level and the time you’re willing to invest to this extend. An exceedingly detailed design could be engaging, but in case it’s past your current ability set, it might lead to dissatisfaction. On the other hand, a too-simple design may not show the challenge you’re seeking out for.
Think around the conclusion utilizing your embroidered Yoda. On the off chance that it’s to be a standout piece in a sew, maybe a bigger, more detailed design would be best. But in case you’re looking to adorn a take or a corner of a cloth, a smaller, easier design may be more suitable.
Choosing your Yoda design isn’t close to picking a design; it’s almost envisioning the travel you’re almost to set out upon and the story you need to tell through your stitches. Let your fondness for the character and your individual aspirations direct your choice.
Transferring Your Yoda Embroidery Design onto the Fabric
Transferring your chosen Yoda embroidery design onto your fabric is a crucial step that bridges the gap between preparation and the actual embroidery work. Begin this process by selecting the most appropriate method for your skill level and the materials at hand. If you opt for tracing, place your fabric over the design, secured on a light source like a window or a lightbox, and carefully use a transfer pen to outline the design. This method allows for direct control over the transfer but requires a steady hand. Alternatively, if precision and ease are what you’re after, utilizing transfer paper is highly recommended. Print or trace the design onto the paper, then iron it onto your fabric according to the paper’s instructions, ensuring the design is perfectly placed and adhered.
Regardless of the method chosen, it’s imperative to position the design thoughtfully on your fabric, keeping in mind the final use of your embroidered piece. Ensure the design is centered or aligned to your preference before securing it, preventing any shifting during the embroidery process. This step might seem minor but taking extra care here sets the foundation for a successful embroidery project. Remember, once the design is transferred, it serves as the guide for every stitch to follow, turning your fabric into a canvas for your Yoda masterpiece. As you embark on this phase, approach it with patience and attention to detail, setting the stage for your embroidery journey.
Embroidery Basics
Embroidery Basics are the foundation of creating a stunning Yoda embroidery design. It is vital to understand and practice the core stitches to ensure your project captures the essence of this iconic character with precision and detail. Begin by familiarizing yourself with the backstitch, a versatile stitch perfect for outlining Yoda’s distinctive features. This stitch offers a continuous, smooth line that is ideal for defining the contours of Yoda’s face and cloak.
Next, delve into the satin stitch, a technique that fills large areas with color, providing a smooth, textured appearance. This stitch is essential for bringing Yoda’s green skin tones and the different shades of his clothing to life. Shifting the heading of the glossy silk stitch can include profundity and measurement to your design, making your Yoda embroidery more exact.
The French tie is another significant stitch in your embroidery arms stockpile, particularly for including complex subtle elements such as Yoda’s eyes and the shrewd wrinkles on his confront. This stitch makes little, tight knots that can speak to miniature highlights with exceptional exactness.
As you advance with these stitches, consider practicing on a bit of scrap fabric. This one permits you to refine your strategy and get comfortable with the stitches sometime recently setting out on the ultimate Yoda design. Understanding these embroidery essentials not as it were prepares you with the skills required for this extent but also lays the basis for future embroidery endeavors. Keep in mind, that the mastery of these fastens will elevate your Yoda design from a straightforward create to a work of art.
Embroidering Yoda – The Step-by-Step Process
Embarking on the journey of bringing Yoda to life through embroidery begins with precision and attention to detail. Once your design is transferred and your materials are prepped, you’re ready to dive into the creative process. Here’s how to proceed:
- Outline Yoda’s features: Utilize the backstitch technique to meticulously outline Yoda’s iconic features. This stitch will serve as the skeleton of your design, providing structure and definition to the character’s form. Start with the larger shapes, such as the outline of the head and body, before moving on to the finer details like the ears and hands.
- Fill in the facial and robe details: With the outlines in place, switch to satin stitches to fill in Yoda’s facial features and robe. Choose varying shades of green for the skin to create a dynamic, lifelike appearance. For the robe, select browns that complement Yoda’s natural color palette. The satin stitch will give these areas a smooth, filled-in look, capturing the essence of Yoda’s appearance.
- Add texture and depth: Finally, to give your Yoda embroidery texture and depth, incorporate French knots. These knots are perfect for creating the twinkling eyes and intricate wrinkles that add character to Yoda’s wise face. Place these knots carefully to convey expression and personality.
Each stitch contributes to the overall image, gradually transforming a simple piece of fabric into a detailed, vibrant portrayal of the beloved Jedi Master. As you work, keep your stitches even and your tension consistent for the best results. This step-by-step approach will guide you through the rewarding process of embroidering Yoda, ensuring your final piece is a testament to both your skill and affection for the character.
Finishing Touches
After meticulously embroidering your Yoda design, it’s basic to provide your work the cleaned wrap-up it merits. Start by cutting absent any stray threads to preserve a flawless appearance. Delicately discharge your artwork from its loop, taking care not to extend or misshape the fabric. Consider pressing your piece on a moo setting with a defensive cloth over it to smooth out any wrinkles without harming the stitches. Options flourish for showing your Yoda embroidery. You might select to secure it in an outline behind glass, protecting its subtle elements and colors. Then again, changing it into a one-of-a-kind fix offers an imaginative way to decorate packs, coats, or any fabric thing, including an individual touch of the Force. Whichever course you select, this last step celebrates your achievement and grandstands your dedication to making a piece that encapsulates the soul of Yoda, guaranteeing it stands as a confirmation of your ability and energy for both Star Wars and the art of embroidery.